Automating Public Services with Kubernetes
Ingress is one of the most under-appreciated features of Kubernetes, and in this post I’ll show you how to easily get a new service up and running with automatic TLS and DNS on a kops cluster in AWS using Ingress rules. Kubernetes Ingress rules allow you to route path or host-based HTTP traffic with native Kubernetes API objects.
Setup
First we’ll need a Kubernetes cluster, which we’ll install with kops. You’ll need the following tools installed:
To create the cluster, run the following commands
# Create a random bucket name
export S3_BUCKET=kops-state-store-$(cat /dev/random | LC_ALL=C tr -dc "[:alpha:]" | tr '[:upper:]' '[:lower:]' | head -c 32)
export KOPS_STATE_STORE=s3://$S3_BUCKET
export AWS_DEFAULT_REGION="us-west-2"
export AWS_AVAILABILITY_ZONES="$(aws ec2 describe-availability-zones --query 'AvailabilityZones[].ZoneName' --output text | awk -v OFS="," '$1=$1')"

# Create the new bucket
aws s3api create-bucket \
    --bucket $S3_BUCKET \
    --create-bucket-configuration LocationConstraint=$AWS_DEFAULT_REGION

# Create the cluster
kops create cluster \
    --name example.cluster.k8s.local \
    --zones $AWS_AVAILABILITY_ZONES \
    --kubernetes-version 1.9.4 \
    --yes
After a few minutes, the cluster will come online. You can monitor the progress with the command
kops validate cluster
Once our cluster is online, we’ll need to install the Helm server, Tiller. Tiller installs helm ‘charts’ into the cluster, and we’ll need a persistent and secure connection to it. The following script will install Tiller into the cluster and open an port-forward from it.
# Install tiller
kubectl create sa -n kube-system tiller
helm init --service-account tiller

# Grant the tiller server permission to the cluster
cat << EOF > tiller-cluster-role.yaml
apiVersion: rbac.authorization.k8s.io/v1
kind: ClusterRole
metadata:
  name: tiller:cluster-admin
rules:
- apiGroups: ['*']
  resources: ['*']
  verbs: ['*']
- nonResourceURLs: ['*']
  verbs: ['*']
EOF
kubectl apply -f tiller-cluster-role.yaml
kubectl create clusterrolebinding tiller:cluster-admin \
    --clusterrole=tiller:cluster-admin \
    --serviceaccount=kube-system:tiller

# Open an SSH tunnel to the tiller service
kubectl port-forward -n kube-system deployment/tiller-deploy 44134
Install nginx-ingress
The charts we’ll be installing are nginx-ingress, external-dns, and cert-manager. While we could certainly install both these components in our cluster by other means, helm will get us up and running very quickly.
For the nginx-ingress controller, we’ll need to override a few default settings.
With Helm, we pass a YAML file with the overrides we want to set. The key
changes are that PROXY protocol is set on the ELB and on the nginx config in
order to get the original IP of client traffic, and the publishService setting
which corresponds to the --publish-service
flag
on the controller. By enabling publishService, this tells the controller to
update each Ingress’ status
with the ELB hostname.
controller:
  image:
    repository: 'quay.io/kubernetes-ingress-controller/nginx-ingress-controller'
    tag: "0.11.0"
  config:
    use-proxy-protocol: "true"
    server-tokens: 'false'
  publishService:
    enabled: true
  kind: Deployment
  updateStrategy:
    rollingUpdate:
      maxUnavailable: 1
    type: RollingUpdate
  service:
    annotations:
      service.beta.kubernetes.io/aws-load-balancer-proxy-protocol: "*"
  stats:
    enabled: true
rbac:
  create: true
  serviceAccountName: nginx-ingress
After setting these overrides in a file, ingress-values.yaml, we can install
the chart.
helm install \
    --name ingress-controller \
    -f ingress-values.yaml \
    stable/nginx-ingress
Install ExternalDNS
Now that we have an Ingress controller installed, we want to be able to access services by DNS name instead of an ELB hostname. This could obviously be done by hand in the AWS console or wherever your DNS provider is, but we want to automate this.
Kubernetes’ ExternalDNS performes this task beautifully. For this example we’re using AWS, but you can use ExternalDNS with Azure, Cloudflare, Google Container Engine, and others.
I’ll override a few settings for this tutorial, but for the most part you can just use the default values along with your AWS credentials.
sources:
  - ingress
provider: aws
aws:
  secretKey: ""
  accessKey: ""
  region: "us-west-2"
  zoneType: "public"
rbac:
  create: true
  # Beginning with Kubernetes 1.8, the api is stable and v1 can be used.
  apiVersion: v1
helm install \
    --name external-dns \
    -f dns-values.yaml \
    stable/external-dns
Install cert-manager
Now that we have DNS routing to our Ingress services, we want to secure our services. Jetstack’s Cert-Manager will auto-provision Let’s Encrypt (ACME) certs based on Ingress rules for you, again automating a repetitive task.
helm install \
    --name cert-manager \
    --set ingressShim.extraArgs='{--default-issuer-name=letsencrypt-prod,--default-issuer-kind=ClusterIssuer}' \
    stable/cert-manager
You can read the cert-manager
documentation for a more thourough explanation of how it works, but for this
tutorial, you’ll need to create (kubectl apply -f issuer.yaml) the following
Issuer (a Custom Resource Definition) after you install the chart.
apiVersion: certmanager.k8s.io/v1alpha1
kind: Issuer
metadata:
  name: letsencrypt-prod
  namespace: default
spec:
  acme:
    # The ACME server URL
    server: https://acme-v02.api.letsencrypt.org/directory
    # Email address used for ACME registration
    email: <your email>
    # Name of a secret used to store the ACME account private key
    privateKeySecretRef:
      name: letsencrypt-prod
    # Enable the HTTP-01 challenge provider
    http01: {}
Bringing it all together
While that seems like a lot of setup work, let’s start to use it! For illustrative purposes, we’ll create a deployment running Nginx and a service routing to it on port 80.
kubectl run nginx --image=nginx --port=80 --labels app=nginx
kubectl expose deployment nginx --port 80 --name nginx --selector app=nginx
At this point we’ve got a service that can route traffic to our nginx pods, but
in order to get public traffic, we’ll need to create an Ingress rule. I’ll use
the following Ingress route to get demo.micahhausler.com to route to this
service.
apiVersion: "extensions/v1beta1"
kind: "Ingress"
metadata:
  annotations:
    kubernetes.io/ingress.class: "nginx"
    kubernetes.io/tls-acme: "true"
    certmanager.k8s.io/issuer: letsencrypt-prod
  name: "demo"
  namespace: "default"
spec:
  rules:
  - host: "demo.micahhausler.com"
    http:
      paths:
      - backend:
          serviceName: "nginx"
          servicePort: 80
        path: "/"
  tls:
  - hosts:
    - "demo.micahhausler.com"
    secretName: "demo-tls"
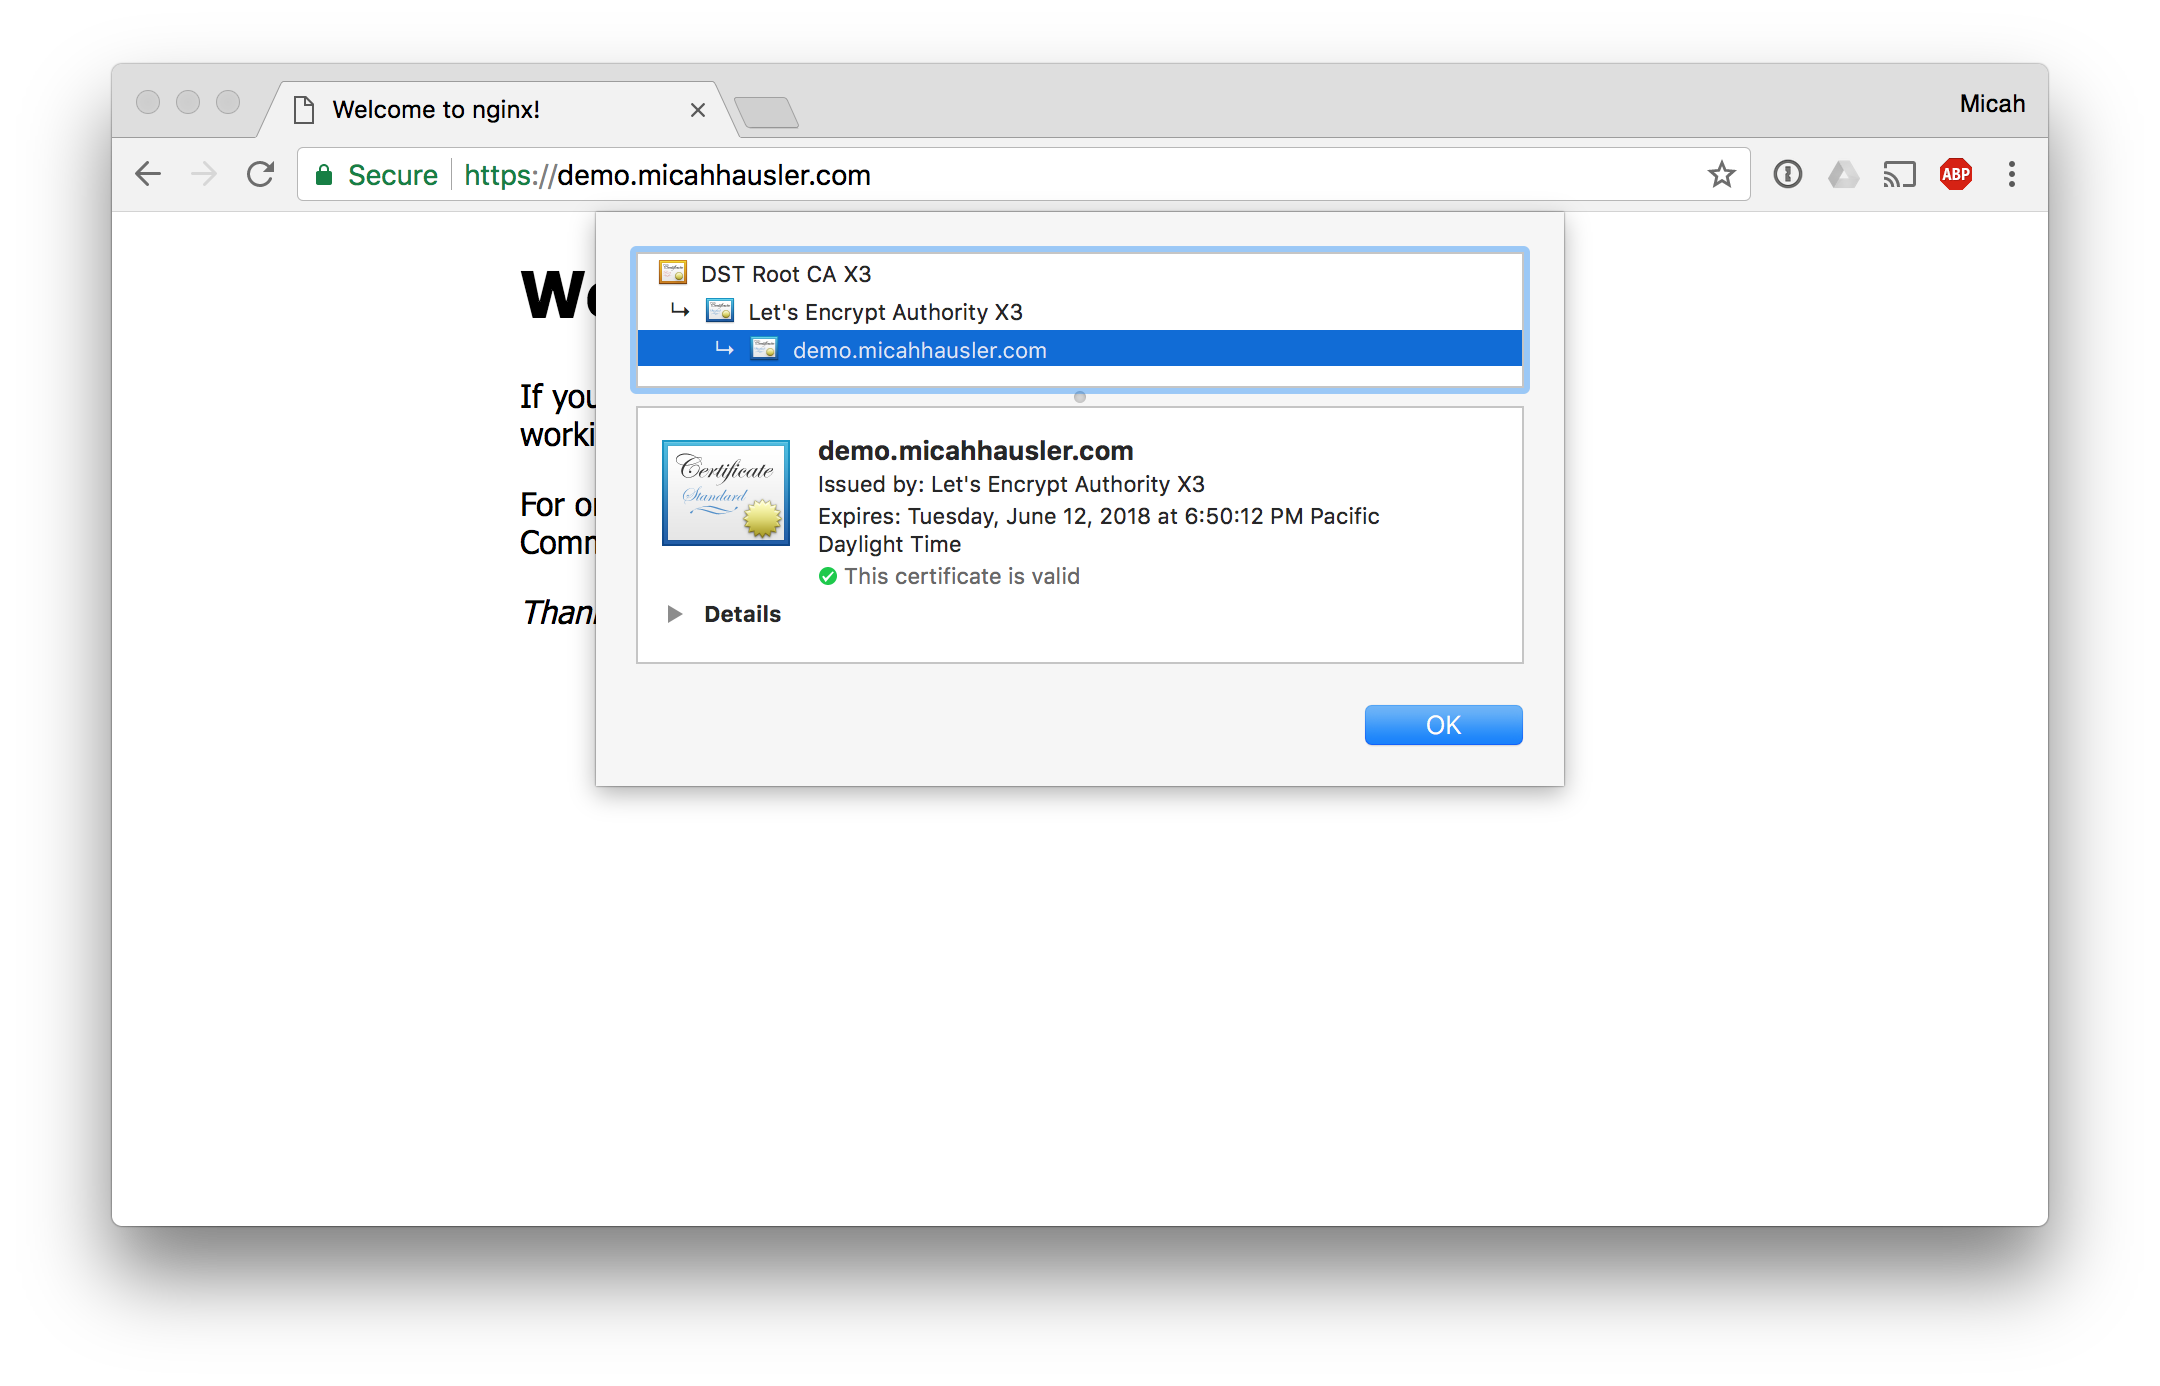
And within 60 seconds the above components create a DNS entry and provision a Let’s Encrypt TLS certificate for our service!
Conclusion
Ingress is a very powerful way to route traffic, and by automating repetitive processes you can now expose new services in under a minute.
If you were to use an ELB per service, the cost would begin to add up fast (around $18/mo per ELB). An added bonus with this architecture is that no mater how many new services you add, you are only using a single ELB in front of the Ingress controller.
If that weren’t compelling enough, all of the components in this post are pluggable. You could use a different Ingress Controller, DNS controller, or TLS provisioner to do each step in this process.